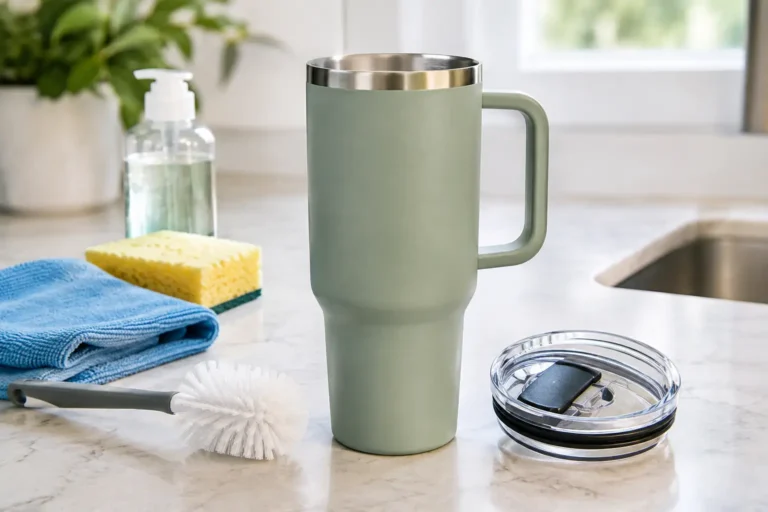
A Stanly tumbler can go from your daily water cup to a source of unpleasant odors faster than most people expect. The stainless steel body may look clean after a quick rinse, but the lid, straw, and silicone seal can hold moisture, drink residue, and buildup in small spaces. A few minutes of proper cleaning helps keep every sip fresh and protects the tumbler parts you use every day.
Why a Stanly Tumbler Needs More Than a Quick Rinse
Insulated tumblers are designed to hold cold drinks for hours. That is convenient for water, coffee, iced tea, smoothies, and protein drinks, but it also means residue can sit in the lid and straw for a long time. Sugary drinks and milk-based beverages are especially likely to leave behind a sticky film.
The lid is usually the part that needs the closest attention. Sliding covers, straw openings, threads, and rubber seals create narrow areas that are easy to miss. Even if the tumbler looks spotless from the outside, trapped moisture can lead to a musty smell or visible dark residue around the gasket.
You do not need harsh chemicals to maintain a clean tumbler. What matters most is taking it apart, cleaning each piece thoroughly, and allowing everything to dry completely before putting it back together.
What You Need to Clean It Properly
For everyday cleaning, use warm water, mild dish soap, a soft bottle brush, a small straw brush, and a clean towel or drying rack. A soft toothbrush can also be useful for the lid grooves and around the sliding mechanism.
For stubborn odor or buildup, keep baking soda and white vinegar on hand. These can help freshen the tumbler when regular soap and water are not enough. Avoid abrasive scouring pads, steel wool, and strong bleach solutions. They can scratch surfaces, damage seals, or leave behind a smell you do not want near your drinking water.
If your tumbler has dishwasher-safe markings, the dishwasher may be an option for certain parts. Still, hand washing is often the better choice for lids, straws, and removable seals because it lets you reach the areas where residue tends to hide. Always check the care instructions for your specific model before using high heat.
How to Clean a Stanly Tumbler Step by Step
Start by emptying the tumbler and rinsing it with warm water. Do not let coffee, juice, or a smoothie sit overnight if you can avoid it. The longer residue stays inside, the more likely it is to dry onto the walls and settle into the lid components.
Remove the lid, straw, and any silicone gasket or seal that comes off easily. Set the pieces aside on a clean towel so nothing gets lost. If you are unsure whether a piece is removable, do not force it. Forcing a lid component can cause leaks or prevent it from fitting correctly later.
Fill the tumbler with warm water and add a few drops of mild dish soap. Use a bottle brush to scrub the bottom, sides, and rim. Pay attention to the area just below the rim, where liquid can collect when the lid is on. Rinse until there are no soap bubbles left.
Next, wash the straw inside and out. A straw brush makes a major difference here because a normal sponge cannot reach the full length of the straw. Run the brush through several times with warm, soapy water, then rinse it well. Hold the straw up to a light source if possible. You should be able to see through it clearly, with no film or particles inside.
Wash the lid separately with warm, soapy water. Use a small brush or toothbrush around the drinking opening, slider track, threads, and underside of the lid. These are common places for dried coffee, flavoring, and moisture to collect. Clean both sides of the silicone seal, then rinse every part thoroughly.
After washing, air-dry the tumbler body, lid, straw, and seal separately. Reassembling while parts are still damp can trap moisture in the lid and create the odor you were trying to prevent. A clean drying rack works well, or place the parts upside down on a fresh towel where air can circulate.
Removing Odors and Stubborn Buildup
If your tumbler smells sour, stale, or musty after washing, it likely needs a deeper clean. Start with a baking soda soak. Add one to two tablespoons of baking soda to the tumbler, fill it with warm water, and let it sit for 30 to 60 minutes. Then scrub, rinse, and dry as usual.
For mineral spots or a lingering drink odor, a diluted vinegar solution can help. Mix equal parts white vinegar and warm water inside the tumbler and let it sit for about 15 to 30 minutes. Do not leave acidic solutions in contact with metal for extended periods. Once the soak is complete, wash the tumbler again with mild dish soap and rinse thoroughly so no vinegar taste remains.
The lid may need its own soak. Place the removable pieces in a bowl of warm, soapy water for 15 minutes, then brush each opening and groove. If you see visible black, pink, or slimy residue that does not come off with careful cleaning, replace the straw, gasket, or lid component if replacement parts are available. A seal is inexpensive compared with the frustration of a tumbler that never smells clean.
Common Mistakes That Leave Tumblers Dirty
The most common mistake is washing only the cup and skipping the lid. The second is leaving a wet straw inside the tumbler with the lid closed. Both habits allow moisture to linger where air cannot reach it.
Another problem is using a heavily scented soap or cleaning product. It may make the tumbler smell clean at first, but fragrance can cling to silicone seals and affect the taste of your water. A mild, unscented dish soap is usually the safer choice.
Avoid using boiling water unless the manufacturer specifically says it is safe for your tumbler. Very hot water can affect certain lid materials, seals, and finishes. Warm water is effective for daily cleaning and is easier on the parts that help prevent leaks.
A Simple Cleaning Schedule That Works
For a tumbler used only for plain water, wash the body, lid, and straw every day or after each use. At minimum, do not simply top it off for days without cleaning it. Bacteria and residue can still collect around the lid, even when the cup contains only water.
If you use coffee, tea with sweeteners, juice, sports drinks, smoothies, or protein shakes, wash the tumbler immediately after use. Those beverages leave more residue and can create odors quickly, especially in a straw or sliding lid.
A deeper clean once a week is a good habit for frequent users. Remove the gasket, inspect the lid parts, brush the straw, and give the tumbler time to dry completely. If your household has several reusable cups, setting aside one regular cleaning day can prevent buildup before it becomes difficult to remove.
When Cleaning Is Not Enough
Sometimes a tumbler is clean but no longer working as it should. A cracked lid, flattened gasket, loose straw, or persistent leak can make the cup harder to use and harder to keep sanitary. Replacing worn parts is often the practical choice.
Also inspect the interior for deep scratches, chipped coating, or damage that creates areas where residue can collect. Normal wear is expected, but a damaged drinking surface deserves attention. If the tumbler has been exposed to floodwater, sewage backup, smoke residue, or other contamination, do not rely on routine kitchen cleaning alone. It may need to be discarded or evaluated based on the type of exposure.
A clean tumbler is a small part of a healthier home routine. Wash it thoroughly, let every piece dry, and give the lid the same attention as the cup itself. Your water should taste like water, not yesterday’s coffee.